Face swapping using face landmark detection
This demo lets you swap a face in one image with another face in another image. It first detects faces in both images and finds its landmarks. Then it swaps the face in first image with in another image.
Sources:
Contents
Options
% [INPUT] path to the first/second images in which you want to apply face swapping
im1 = fullfile(mexopencv.root(),'test','lena.jpg');     % source
im2 = which('kids.tif');                                % destination

% [INPUT] path to binary file storing the trained model to load
modelFile = fullfile(mexopencv.root(),'test','face_landmark_model.dat');
if exist(modelFile, 'file') ~= 2
    % download model from GitHub
    disp('Downloading model (~ 69MB)...')
    url = 'https://cdn.rawgit.com/opencv/opencv_3rdparty/contrib_face_alignment_20170818/face_landmark_model.dat';
    urlwrite(url, modelFile);
end

% [INPUT] path to the cascade xml file for the face detector
xmlFace = fullfile(mexopencv.root(),'test','lbpcascade_frontalface.xml');
download_classifier_xml(xmlFace);

% name of user-defined face detector function
faceDetectFcn = 'myFaceDetector';
assert(exist([faceDetectFcn '.m'], 'file') == 2, 'missing face detect function');
Images
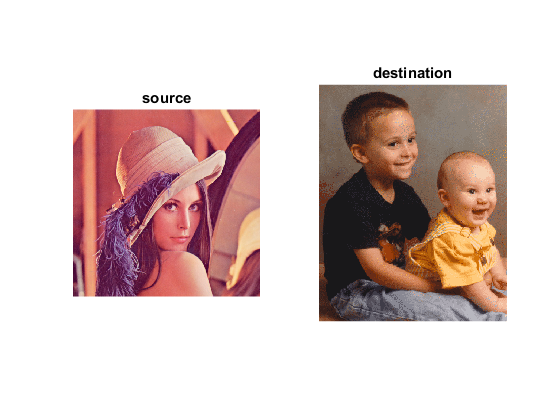
load and show images
img1 = cv.imread(im1);
img2 = cv.imread(im2);
subplot(121), imshow(img1), title('source')
subplot(122), imshow(img2), title('destination')
resized images as it is easier to process small images, resized according to their actual ratio
ratio1 = size(img1,2) / size(img1,1);
ratio2 = size(img2,2) / size(img2,1);
img1 = cv.resize(img1, fix(640 * [ratio1, ratio1]));
img2 = cv.resize(img2, fix(640 * [ratio2, ratio2]));
Init
create instance of the face landmark detection class, and set the face detector function, then load the pre-trained model
obj = cv.FacemarkKazemi();
obj.setFaceDetector(faceDetectFcn);
obj.loadModel(modelFile);
Detect
detect faces in both images
faces1 = obj.getFaces(img1);
faces2 = obj.getFaces(img2);
assert(~isempty(faces1) && ~isempty(faces2), 'No faces found');
in case of multiple detections, take the biggest face in each image
if numel(faces1) > 1
    [~,ind] = max(cellfun(@cv.Rect.area, faces1));
    faces1 = faces1(ind);
end
if numel(faces2) > 1
    [~,ind] = max(cellfun(@cv.Rect.area, faces2));
    faces2 = faces2(ind);
end
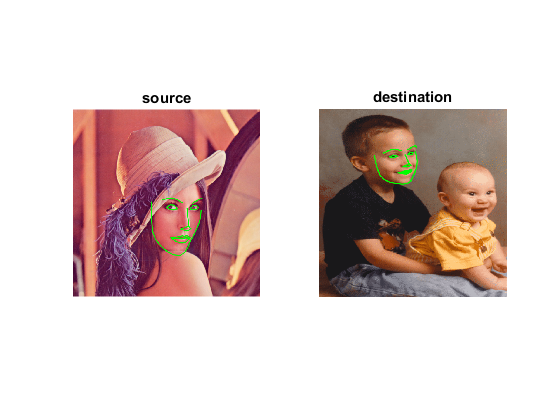
detect landmarks in both images
shapes1 = obj.fit(img1, faces1);
shapes2 = obj.fit(img2, faces2);
assert(~isempty(shapes1) && ~isempty(shapes2), 'No landmarks found');
pts1 = shapes1{1};
pts2 = shapes2{1};
show landmarks
figure
subplot(121), imshow(drawLandmarks(img1, pts1)), title('source')
subplot(122), imshow(drawLandmarks(img2, pts2)), title('destination')
Swap
First compute convex hull to find the boundary points of the face in the image which has to be swapped.
Next as we need to warp one face over the other, we need to find affine transform. To find affine transform in OpenCV, it requires three set of points to calculate the affine matrix. Also we just need to warp the face instead of the surrounding regions. Hence we divide the face into triangles so that each triangle can be easily warped onto the other image.
The function divideIntoTriangles divides the detected faces into triangles. The function warpTriangle then warps each triangle of one image to other image to swap the faces.
compute convex hull
indices = cv.convexHull(pts2, 'ReturnPoints',false);
pts1 = pts1(indices + 1);
pts2 = pts2(indices + 1);
Triangulation for points on the convex hull
rect = [0, 0, size(img2,2), size(img2,1)];
triangles = divideIntoTriangles(rect, pts2);
Apply affine transformation to Delaunay triangles
img1 = single(img1);
img1Warped = single(img2);
for i=1:numel(triangles)
    % Get matching triangles points in img1 and img2
    tr1 = pts1(triangles{i} + 1);
    tr2 = pts2(triangles{i} + 1);
    % warp tr1 in img1 into tr2 in img2
    img1Warped = warpTriangle(img1, img1Warped, tr1, tr2);
end
img1Warped = uint8(img1Warped);
show result
figure, imshow(img1Warped)

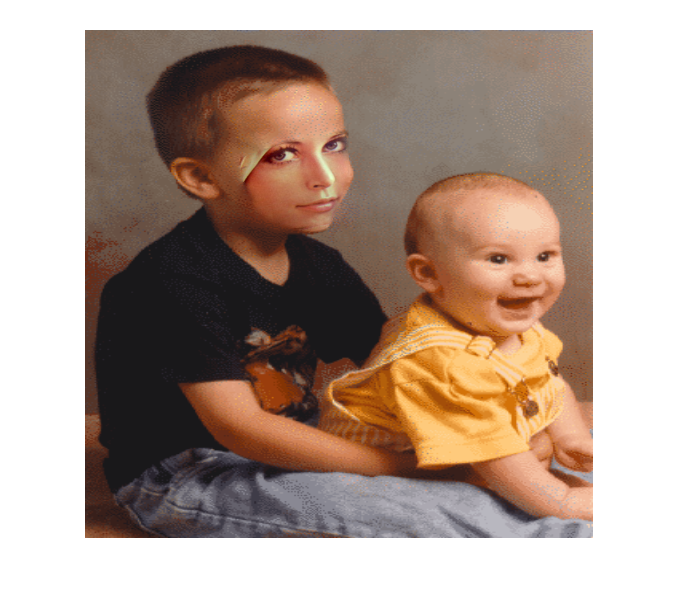
Seamless cloning
Even after warping, the results somehow look unnatural. Hence to improve the results we apply seamless cloning to get the desired results as required.
create mask from convex hull
mask = zeros(rect(4), rect(3), 'uint8');
mask = cv.fillConvexPoly(mask, pts2, 'Color',255);
Clone seamlessly
r = cv.boundingRect(pts2);
center = r(1:2) + r(3:4)/2;
img1Warped = cv.seamlessClone(img1Warped, img2, mask, center, 'Method','NormalClone');
show result
figure, imshow(img1Warped)
Helper function
function download_classifier_xml(fname)
    if exist(fname, 'file') ~= 2
        % attempt to download trained Haar/LBP/HOG classifier from Github
        url = 'https://cdn.rawgit.com/opencv/opencv/3.4.0/data/';
        [~, f, ext] = fileparts(fname);
        if strncmpi(f, 'haarcascade_', length('haarcascade_'))
            url = [url, 'haarcascades/'];
        elseif strncmpi(f, 'lbpcascade_', length('lbpcascade_'))
            url = [url, 'lbpcascades/'];
        elseif strncmpi(f, 'hogcascade_', length('hogcascade_'))
            url = [url, 'hogcascades/'];
        else
            error('File not found');
        end
        urlwrite([url f ext], fname);
    end
end

function img = drawLandmarks(img, pts, varargin)
    %DRAWLANDMARKS  Draw facial landmark points
    %
    %     img = drawLandmarks(img, pts)
    %     img = drawLandmarks(img, pts, 'OptionName',optionValue, ...)
    %
    % ## Input
    % * __img__ input image
    % * __pts__ face landmarks (68 points)
    %
    % ## Output
    % * __img__ output image with drawn landmarks
    %
    % ## Options
    % Optional drawing params passed to cv.polylines function (color,
    % thickness, line type).
    %
    % The function assumes annotations following the Multi-PIE 68 points
    % mark-up, as described in:
    % [i-bug][https://ibug.doc.ic.ac.uk/resources/facial-point-annotations/].
    %
    % For reference, see:
    %
    % ![image][https://ibug.doc.ic.ac.uk/media/uploads/images/annotpics/figure_68_markup.jpg]
    %
    % See also: cv.Facemark.drawFacemarks
    %

    % points
    %{
    p1 = {
        pts(1:17),  ...  % chin
        pts(18:22), ...  % left eyebrow
        pts(23:27), ...  % right eyebrow
        pts(28:31)       % nose top part
    };
    p2 = {
        pts(31:36), ...  % nose bottom part
        pts(37:42), ...  % left eye
        pts(43:48), ...  % right eye
        pts(49:60), ...  % lips outer part
        pts(61:68)       % lips inside part
    };
    %}
    p1 = mat2cell(pts(1:31), 1, [17 5 5 4]);
    p2 = mat2cell(pts(31:end), 1, [6 6 6 12 8]);

    % draw polylines (p1: not closed, p2: closed)
    opts = {'Color',[0 255 0], 'Thickness',2, 'LineType','AA'};
    opts = [opts varargin];
    img = cv.polylines(img, p1, 'Closed',false, opts{:});
    img = cv.polylines(img, p2, 'Closed',true, opts{:});
end

function delaunayTri = divideIntoTriangles(rect, points)
    %DIVIDEINTOTRIANGLES  Divide the face into triangles for warping

    % Create an instance of Subdiv2D, insert points, and get triangles
    subdiv = cv.Subdiv2D(rect);
    subdiv.insert(points);
    triangleList = subdiv.getTriangleList();

    delaunayTri = {};
    for i=1:numel(triangleList)
        % 3-points triangle
        tr = triangleList{i};
        tr = {tr(1:2), tr(3:4), tr(5:6)};

        % skip triangle if not all its points are within image ROI
        if all(cellfun(@(pt) cv.Rect.contains(rect, pt), tr))
            % corresponding indices into convex hull points
            [~,ind] = cv.batchDistance(cat(1,tr{:}), cat(1,points{:}), ...
                'NormType','L1', 'K',1);
            delaunayTri{end+1} = ind;
        end
    end
end

function img2 = warpTriangle(img1, img2, tr1, tr2)
    %WARPTRIANGLE  Warp triangle1 in img1 into corresponding triangle2 in img2

    rect1 = cv.boundingRect(tr1);
    rect2 = cv.boundingRect(tr2);

    % Offset points by left top corner of the respective rectangles
    tr1Rect = cellfun(@(pt) pt - rect1(1:2), tr1, 'UniformOutput',false);
    tr2Rect = cellfun(@(pt) pt - rect2(1:2), tr2, 'UniformOutput',false);

    % estimate transformation from source to destination triangles
    warp_mat = cv.getAffineTransform(tr1Rect, tr2Rect);

    % Apply transformation to small rectangular patch
    img1Rect = cv.Rect.crop(img1, rect1);
    img2Rect = cv.warpAffine(img1Rect, warp_mat, 'DSize',rect2(3:4), ...
        'BorderType','Reflect101');

    % Get mask by filling triangle
    mask = zeros([rect2([4 3]) 3], 'single');
    mask = cv.fillConvexPoly(mask, tr2Rect, 'Color',[1 1 1], 'LineType','AA');

    % cut out triangle and paste it on top of destination image
    img2Rect = cv.multiply(img2Rect, mask);
    img2 = cv.Rect.crop(img2, rect2, cv.multiply(cv.Rect.crop(img2, rect2), 1 - mask));
    img2 = cv.Rect.crop(img2, rect2, cv.Rect.crop(img2, rect2) + img2Rect);
end

% The facemark API provides the functionality to the user to use their own
% face detector. The code below implements a sample face detector. This
% function must be saved in its own M-function to be used by the facemark API.
function faces = myFaceDetector(img)
    persistent obj
    if isempty(obj)
        obj = cv.CascadeClassifier();
        obj.load(xmlFace);
    end

    if size(img,3) > 1
        gray = cv.cvtColor(img, 'RGB2GRAY');
    else
        gray = img;
    end
    gray = cv.equalizeHist(gray);
    faces = obj.detect(gray, 'ScaleFactor',1.4, 'MinNeighbors',2, ...
        'ScaleImage',true, 'MinSize',[30 30]);
end